
2) Fit check.
Your scan clothing needs to lay flush with the body becuase our scanning technology reproduces your shape based on the clothing’s surface.
When your body scan kit arrives, please try your scan clothing on over your normal undergarments as soon as you can to assess the fit.
What’s a “good” fit?
When your body scan kit arrives, please try your scan clothing on over your normal undergarments as soon as you can to assess the fit.
What’s a “good” fit?
- It’s fairly snug. We are looking for a pretty snug fit, especially under the arms, but not so tight that the clothing distorts your figure.
- The clothing hugs your curves. Check areas like around the bust, at the arms, and the small of your back for fabric that may pull away instead of hugging your body smoothly.
To fix this issue, scootch more fabric into the area so it lies flat in contact with your skin. Or you can pin or sew the garment so the fabric lays flush with your body (we can remove the pinned out fabric darts from the scan later during the editing process.) - For clear definition around your curves:
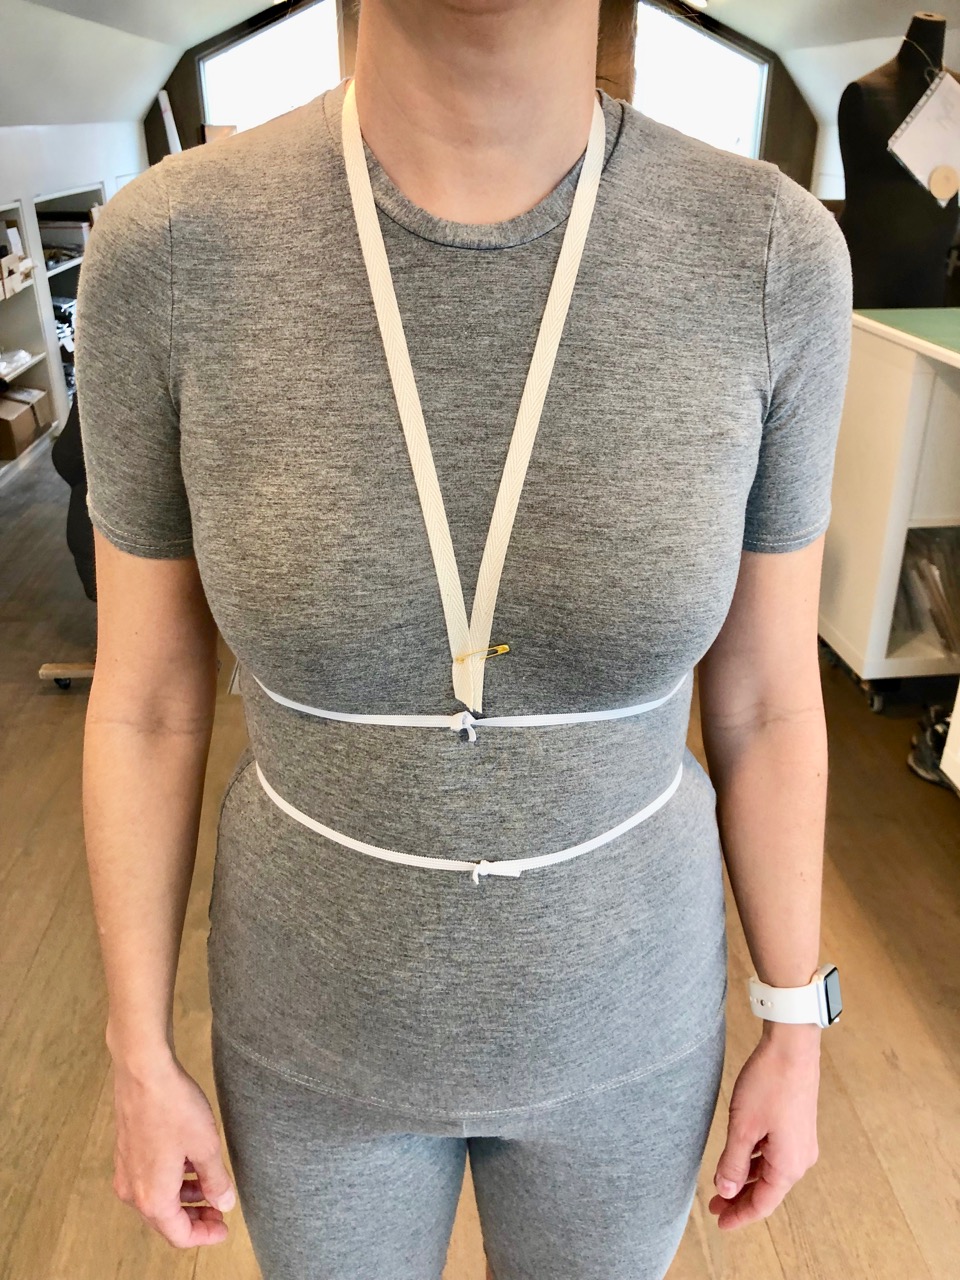
- Tie elastic around your natural waist and at the underbust if you would like bust definition.
- For those with a bust, make sure the shirt is not pulled down over your bra too tightly. If the shirt is pulled down too much, it will compress and lower your bust. Feel free to measure your bust girth and position with the scan clothing on to ensure you scan with the desired bust shape.
- For those requiring cleavage definition, apply twill tape between your breasts. Wrap it behind your neck and firmly secure the ends to your bra with a safety pin and trim the ends off as shown below. This helps greatly to achieve definition between your breasts by holding the fabric close to your chest.
Please let us know if you have any concerns before your body scan session. In many cases, we can work around fit issues without having to exchange your clothing for a different size.

Copyright 2024 Little Barn Industries LLC